Using add-ins in Online Outlook
Add-ins in web Outlook are programs or utilities that help you automate tasks when you view or create messages. Microsoft has partnered with leading companies to build add-ins that help you get things done right from your inbox.To turn on an add-in, do the following:
-
Click the drop-down menu on any email message in web Outlook, and then select Get Add-ins.

-
On the Add-ins for Outlook page, select the add-in.
Click Add.
To remove an add-in, select the add-in, right-click it and then click Remove.
For more information, visit https://support.office.com/en-us/article/using-add-ins-in-outlook-com-a5672109-e4f3-4119-abea-72323e9653cf.
Get an Office Add-in for Outlook App
Microsoft has partnered with leading companies to build programs that help you get things done right from your inbox. These programs are called Office Add-ins in Outlook 2016 and Outlook 2019, and Apps for Office in Outlook 2013, and help you speed up the way you access information on the web.
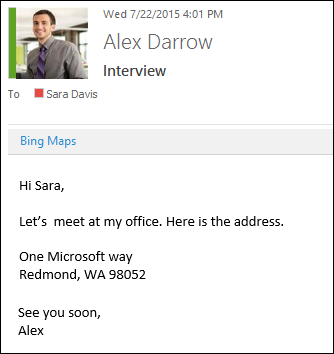
For example, the Bing Maps add-in becomes available in an email that contains an address, and you can use it to check the online map for that location right from your email.
Some add-ins are installed by your email administrator, but you can install other ones from the Office Store.
Select a tab below for instructions for your version of Outlook.
Install an add-in from the Office Store
-
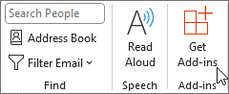
In Outlook, click Home > Get Add-ins on the ribbon.
-
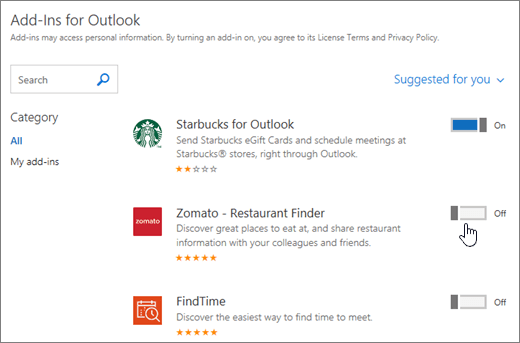
On the Add-Ins for Outlook page, browse for the add-in you want by selecting All and scrolling through the list, or search for an add-in by using the Search box. When you find an add-in you want, review its privacy policy.
For free add-ins, use the toggle controls to turn them on or off. For paid add-ins and free trials, select Get it to finish your purchase.
-
-
When the add-in is installed, go to File > Manage Add-ins or Manage Apps to make sure it's turned on. When you’re prompted to sign in, type the email address and password you use to sign in to Office programs.
Note: If you don’t see the Manage add-ins (or Manage Apps) button, you won’t be able to get add-ins for Outlook. To get them, you’ll need Office 2013 or Office 2016 and Exchange 2013 or Exchange 2016, and your administrator needs to activate add-ins for Outlook.
Use an add-in for Outlook
The add-ins that you have installed automatically appear in the gray add-in bar near the top of the message when there is data in the email that is related to the add-in.
For example, when you open an email message that has a street address, you'll see that the add-in's name, Bing Maps, is displayed in the add-in bar.
Choose the add-in to access the data it offers.
When you're writing a new email message (Home > New Email), you can access other installed add-ins from the Message ribbon.

When you're in the main Outlook window (without a new message open), you can access your installed add-ins from the ribbon.
Note: If the Reading Pane (View > Reading Pane) is set to Off, all add-ins will appear disabled.
Manage your add-ins
In Outlook, go to File > Manage Add-ins or Manage Apps. When you’re prompted to sign in, type the email address and password you use to sign in to Office programs.

On the Manage add-ins page, you can do the following:
-
Select Find more add-ins for Outlook at the Office Store to go to the Office Store.
-
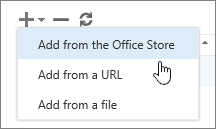
Use the options on the toolbar to add more add-ins, uninstall an add-in, or refresh the page to see a list of the latest add-ins.
-
Turn on or turn off an add-in by checking or clearing its check box in the Turned on column.
-
Select an add-in to see more information about it on the right side of the page.
Tip: You can also use Outlook Web App to manage your add-ins. On the top right corner of the page, choose Settings  > Manage integrations.
For more information on Outlook app add-ins visit https://support.office.com/en-us/article/get-an-office-add-in-for-outlook-1ee261f9-49bf-4ba6-b3e2-2ba7bcab64c8.
