Protect Your SmarterMail Email with Two Factor Authentication
We strongly recommend enabling Two Factor Authentication (2FA) on your Pen Publishing hosted email. 2FA adds an extra layer of protection to your SmarterMail account and can significantly reduce the likelihood of unauthorized access to your account (even if your password is "hacked").
Enabling Two Factor Authentication (2FA) for SmarterMail
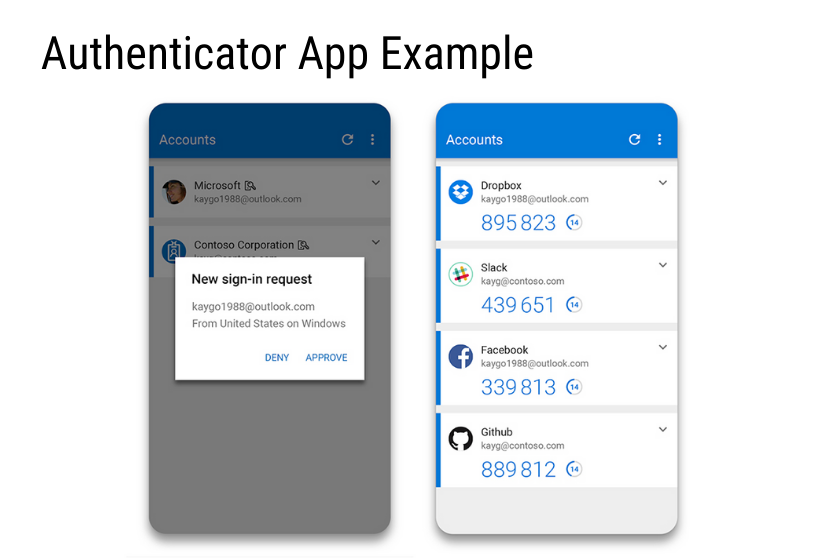
Logging into webmail (https://webmail.ppi.net) with 2FA enabled requires two methods of authentication: your SmarterMail account password and a verification code that's only available to you. This verification code can be generated from an authenticator app like Google or Microsoft Authenticator (this app is available for both iOS and Android) or emailed to your recovery email on file. 2FA will also generate a new password for your email clients (i.e.: Outlook, Android, iPhone, etc.).
To Enable 2FA, use the following steps:
- Log into the mail server through https://webmail.ppi.net
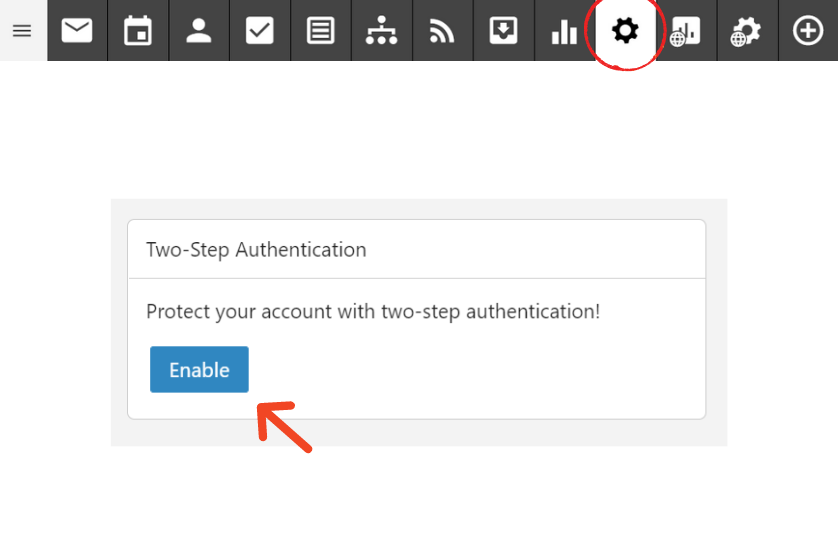
- Go to settings (gear icon)
- Look for 2-Step Authentication Option

Within the 2-Step Authentication pane, you have three options:
- Enabled (this allows each user the option to enable 2FA)
- Forced (this forces each user to use 2FA)
- Disabled (this disables the 2FA feature for all users)
Choose one of the options and click the Save button in the top-left.
- If your domain admin has chosen the "Enabled" option, each of your users will need to log in to enable it:
- Click on the Settings icon (gear) at the top of your screen
- Ensure you're on the Account tab on the left-hand side
- Within the 2-Step Authentication pane, click the Enable button
Choose your verification method:
- Recovery Email Address: This will send a verification code to the recovery email address you have on file. Note: If you didn't receive the verification code in your inbox, check your junk or spam folder.
- Authenticator App: You will use your authenticator app (i.e.: Microsoft Authenticator, Google Authenticator) to retrieve your verification code.
- Click Next
- Enter in the verification code it sent you and click Check

Now, anytime you log into https://webmail.ppi.net you'll be required to enter in the new verification code. You will also be required to update the password within your email clients (i.e.: Outlook, Android, iPhone, etc.) to your 2FA password found within Settings > Account > 2-Step Authentication
If your domain admin has chosen the "Forced" option, you will be required to go through the 2FA process the next time you log in at webmail.ppi.net:
- Choose your verification method:
- Recovery Email Address: This will send a verification code to the recovery email address you have on file. Note: If you didn't receive the verification code in your inbox, check your junk or spam folder.
- Authenticator App: You will use your authenticator app (i.e.: Microsoft Authenticator , Google Authenticator) to retrieve your verification code.
- Enter in the verification code it sent you and click Check
- Upon logging in for the first time, it'll tell you the newly generated password for your email clients (i.e.: Outlook, Android, iPhone, etc.). The 2FA password is also found within Settings > Account > 2-Step Authentication.
If you'd like to reset your 2FA email client password, follow these steps:
- Click on Settings icon (gear) at top of your screen
- Ensure you're in the Account tab on the left
- Click the Eye icon for the password you'd like to reset within the 2-Step Authentication pane
- Click on the Refresh icon (circle arrow). A confirmation popup window will show. Click Reset
- Any email client that had access to this email address will now need to enter this new password
NOTE: Forcing 2-Step Authentication will disconnect any third-party clients/devices that the user has configured. Before forcing 2-Step Authentication, we advise notifying users of the change and providing details on how to set up 2-Step Authentication and configure their third-party accounts.

